

Brewery Butterfly Valve Seats: How to Identify, Measure & Replace
28th Aug 2026
Butterfly valves are found throughout breweries and beverage processing systems, helping control the flow of beer, water, cleaning solutions, and other liquids. While the stainless steel valve body may last for years, the flexible seat inside the valve is a wear component that may eventually need to be replaced.
The good news is that you usually don’t need to replace the entire valve. If the valve body, disc, stem, and handle are still in good condition, replacing the butterfly valve seat may be all that’s needed to restore a dependable seal.
The challenge is identifying the correct replacement. A 1-1/2" butterfly valve seat, for example, is not necessarily interchangeable with every other 1-1/2" seat. Here’s how to identify, measure, and replace a brewery butterfly valve seat.
What is a butterfly valve seat?
A butterfly valve uses a circular stainless steel disc that rotates inside the valve body to start, stop, or regulate flow.
The butterfly valve seat is the flexible sealing component that surrounds the disc. When the valve closes, the disc presses against the seat to create a seal and prevent liquid from passing through the valve.
Because the seat is repeatedly compressed, exposed to process liquids, and subjected to cleaning and CIP cycles, it can wear over time.
How do I know if a butterfly valve seat needs to be replaced?
A leaking valve doesn’t automatically mean the entire valve needs replacement. First inspect the seat and other valve components. Common signs that a butterfly valve seat may need replacement include:
• Leaking when the valve is closed
• Cuts, cracks, or tears in the seat
• Flattened or permanently compressed areas
• Swelling or distortion
• Hardening or loss of flexibility
• Visible wear where the disc contacts the seat
• Damage caused during valve disassembly or cleaning
Also inspect the valve body and disc for damage, buildup, or other problems that could prevent a proper seal. If the seat is visibly damaged or no longer seals properly, replacement is generally the next step.
Are all 1-1/2" or 2" butterfly valve seats the same?
No. This is one of the most important things to know when ordering a replacement butterfly valve seat.
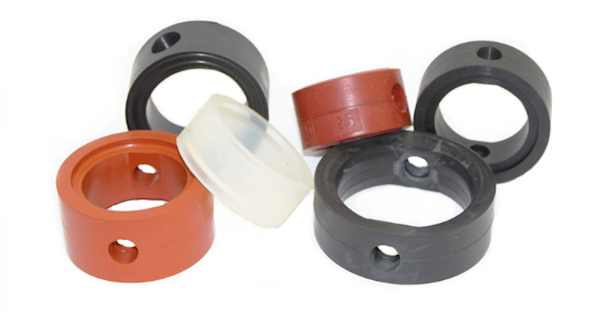
Two valves may both have 1-1/2" Tri-Clamp connections but use completely different seats. The outside diameter, inside diameter, thickness, hub dimensions, and overall profile can vary by valve manufacturer and design.
BreweryGaskets.com carries replacement butterfly valve seats compatible with many popular brewery and sanitary valve brands and styles. If you know the valve manufacturer and model or have markings on the old seat, start there. If you don’t, measurements can often help identify the correct replacement.
How do I identify an unknown butterfly valve seat?
Before throwing away the old seat, inspect it carefully and gather as much information as possible.
Manufacturer or brand: Check the valve body, handle, disc, and old seat for manufacturer names, logos, part numbers, or other markings.
Valve size: Determine the nominal valve size, such as 1-1/2", 2", 2-1/2", 3", or 4".
Markings on the seat: Some seats have molded numbers, letters, DN sizes, or other identification marks. Record exactly what you see.
Seat material and color: Note whether the existing seat appears to be EPDM, silicone, FKM/Viton, or another material. Color can sometimes help with identification, but don’t rely on color alone to determine material.
Equipment information: If the valve is part of a tank, filter, skid, or other piece of brewery equipment, record the equipment manufacturer and model as well.
Taking a few clear photos of the seat and valve can also make identification easier.
How to measure a butterfly valve seat
When the manufacturer or part number isn’t known, accurate measurements are especially important. For the best results, use calipers and measure in millimeters. Small dimensional differences can matter when matching a replacement seat.
Depending on the seat style, useful dimensions include:
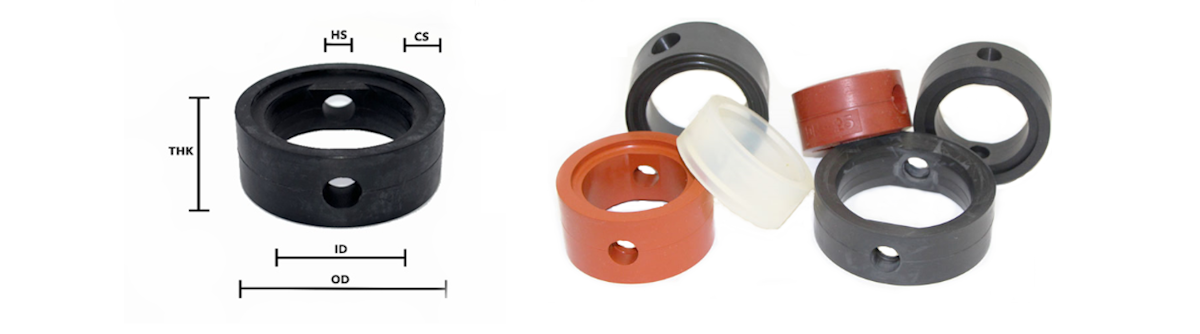
Outside Diameter (OD) — Measure across the widest outside portion of the seat.
Inside Diameter (ID) — Measure across the inside opening of the seat.
Thickness (TH) — Measure the overall thickness of the seat.
Hole Size (HS) — Measure the hub or stem opening area where applicable.
Also compare the overall shape and profile of the old seat with the replacement. Don’t assume that nominal valve size alone identifies the seat. Two seats can look similar at first glance but have different dimensions and may not be interchangeable.
For additional help identifying your seat, see our Butterfly Valve Seat Measuring Guide for a basic diagram showing the measurements to take.
Should I measure in inches or millimeters?
We recommend measuring butterfly valve seats in millimeters whenever possible.
Many sanitary valve seats have relatively small dimensional differences, and millimeter measurements taken with a caliper make it easier to compare your existing seat with published replacement dimensions. The more accurate your measurements, the easier it is to narrow down the correct replacement.
What butterfly valve seat material should I choose?
EPDM and silicone are two common butterfly valve seat materials used in brewery and beverage applications. Other materials, including FKM/Viton, may be available for certain valves and applications.
EPDM is a popular general-purpose brewery material with good resistance to hot water, steam, detergents, and many commonly used cleaning solutions.
Silicone offers excellent flexibility and performs across a wide temperature range, making it useful in many food and beverage applications.
FKM/Viton may be appropriate for applications requiring greater resistance to certain chemicals, oils, or higher temperatures.
When replacing a seat, matching the original material is often the simplest approach. If you plan to change materials, consider the product, temperature, cleaning chemicals, and CIP conditions the seat will encounter.
How do you replace a butterfly valve seat?
Butterfly valve designs vary, so always follow the valve manufacturer’s instructions when available. In general, replacement involves:
1. Remove the valve from service and make sure the system is fully depressurized and safe to work on.
2. Remove the valve from the piping or equipment as necessary.
3. Disassemble the valve according to the manufacturer’s instructions.
4. Remove the disc, stem, and old seat as required by the valve design.
5. Inspect and clean the valve body and disc.
6. Compare the new seat with the old one to confirm that the dimensions and profile match.
7. Carefully install the new seat and reinstall the valve disc and stem.
8. Reassemble the valve, making sure the seat is properly positioned and isn’t pinched or twisted.
9. Operate the valve manually to make sure the disc opens and closes smoothly.
10. Check the valve for proper sealing before returning it to normal production.
If you’re unsure about the procedure for a particular valve, check with the valve manufacturer.
Why is my butterfly valve still leaking after replacing the seat?
If a new seat doesn’t solve the problem, don’t immediately assume the replacement seat is defective. Check for:
• Incorrect seat size or style
• Seat installed incorrectly
• Seat pinched or twisted during assembly
• Damaged or worn valve disc
• Damage or buildup on sealing surfaces
• Bent or worn valve components
• Improper valve assembly
• Incorrect seat material for the application
Comparing the new and old seats side-by-side before installation can help catch an incorrect replacement before the valve is reassembled.
When should I replace the entire butterfly valve?
If the butterfly valve seat is worn but the valve body, disc, stem, and handle are still in good condition, replacing the seat may be all that is needed. However, if other valve components are damaged, excessively worn, corroded, or no longer operating smoothly, replacing the complete valve may make more sense.
When replacing a complete valve, consider the valve size, connection type, handle style, seat material, and requirements of your brewery process. BreweryGaskets.com offers a selection of sanitary butterfly valves for brewery and beverage processing applications.
Need help identifying a butterfly valve seat?
With so many valve manufacturers and seat designs in use, identifying an unknown replacement isn’t always obvious.
If you aren’t sure which seat you need, gather as much information as possible:
• Valve manufacturer or brand
• Valve size
• Numbers or markings on the seat
• Outside diameter
• Inside diameter
• Overall thickness
• Hub dimensions
• Seat material, if known
• Clear photos of the seat and valve
Then compare your measurements with our Butterfly Valve Seat Measuring Guide or contact us for assistance.
BreweryGaskets.com stocks replacement butterfly valve seats for many popular brewery and sanitary valve styles, along with complete sanitary butterfly valves, Tri-Clamp gaskets, fittings, clamps, and other brewery sealing products.
Note: These are general guidelines only. Maintenance needs may vary based on production frequency, cleaning procedures, operating conditions, and the specific equipment used in your brewery. Always follow the equipment manufacturer’s instructions and recommendations for proper installation and components.